Logitech Wireless Headset Drivers, Logitech is a well-known brand that offers high-quality audio solutions, including wireless headsets. To get the most out of your Logitech wireless headset, it is essential to have the correct drivers installed on your computer. Drivers act as a communication bridge between your device and the operating system, ensuring optimal performance and compatibility. This article will guide you on downloading, installing, and updating Logitech wireless headset drivers.
Why Are Drivers Important for Your Logitech Wireless Headset?
Drivers are critical for ensuring your Logitech wireless headset functions seamlessly. They enable features such as:
- High-quality audio transmission.
- Clear microphone communication.
- Compatibility with gaming and communication platforms like Zoom, Microsoft Teams, or Discord.
- Firmware updates for improved performance.
Without the correct drivers, your headset may face issues like distorted sound, microphone malfunctions, or connection errors.
Steps to Download Logitech Wireless Headset Drivers
Follow these steps to download and install the drivers for your Logitech wireless headset:
1. Visit the Logitech Support Website
Logitech provides dedicated support for its products on its official website. Navigate to Logitech Support and select the “Support” section from the menu.
2. Search for Your Headset Model
Type your headset model (e.g., Logitech G533, H800, or Pro X Wireless) in the search bar. If you’re unsure of your model, check the label on the headset or the box it came in.
3. Select the Correct Drivers
Once you locate your headset model, go to the “Downloads” or “Software” section. Ensure you download drivers compatible with your operating system (Windows, macOS, etc.).
4. Download and Install
Click the download link to save the driver file to your computer. After the download is complete:
- Open the file and follow the on-screen instructions.
- Restart your computer if prompted to apply the changes.
How to Update Logitech Wireless Headset Drivers
Keeping your drivers up to date is crucial for maintaining performance. Here’s how you can update your Logitech wireless headset drivers:
1. Use Logitech G HUB
Logitech G HUB is the official software for managing Logitech devices. It automatically checks for updates and installs them. Download G HUB from Logitech’s website if you don’t already have it installed.
2. Manual Update via Device Manager (Windows)
- Right-click the Start Menu and select Device Manager.
- Find your Logitech headset under the “Sound, video, and game controllers” section.
- Right-click the device and select Update driver.
- Choose Search automatically for drivers to let Windows find and install the latest version.
3. macOS Updates
On macOS, ensure your system is updated by going to System Preferences > Software Update. Logitech drivers often come bundled with macOS updates.
Troubleshooting Common Driver Issues
If you experience issues with your Logitech wireless headset, consider these troubleshooting steps:
- Reinstall Drivers: Uninstall the existing drivers from Device Manager and reinstall them using the steps above.
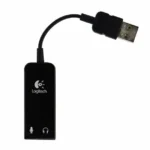
- Check USB Connections: If using a USB dongle, ensure it is securely connected to the port.
- Reset Your Headset: Some Logitech headsets have a reset button. Refer to the manual for instructions.
- Contact Logitech Support: If issues persist, reach out to Logitech’s support team for professional assistance.
Conclusion
Having the correct Logitech wireless headset drivers installed is essential for enjoying a hassle-free audio experience. Whether you’re gaming, attending online meetings, or simply listening to music, these drivers ensure optimal performance and compatibility. By following the steps outlined above, you can easily download, install, and update the drivers for your Logitech wireless headset. Don’t forget to check for updates regularly to keep your headset functioning at its best.
Read More:


No Comment! Be the first one.